Setting up matrix analysis
Your step-by-step guide to turning numerous documents into structured information.

Preparation: The right documents and criteria
Before creating your first matrix analysis, clarify two things: Which documents you want to analyze and what information you need from them. Good preparation saves time later and leads to better results.
First, gather all relevant documents. These may include contracts of the same type, various court decisions on a topic, or compliance documents that need to be reviewed according to uniform criteria.
Step 1: Start a new matrix analysis
Open Noxtua, then navigate to the "Matrix Analysis" section in the left navigation. Click "New Analysis" to create a new matrix. You'll now enter the workspace for your new analysis.

Step 2: Upload documents
Upload all documents you want to analyze, up to a limit of 50 files.
Each uploaded document automatically appears as a row in your matrix. You'll see the file names and can already recognize how your matrix will be structured.
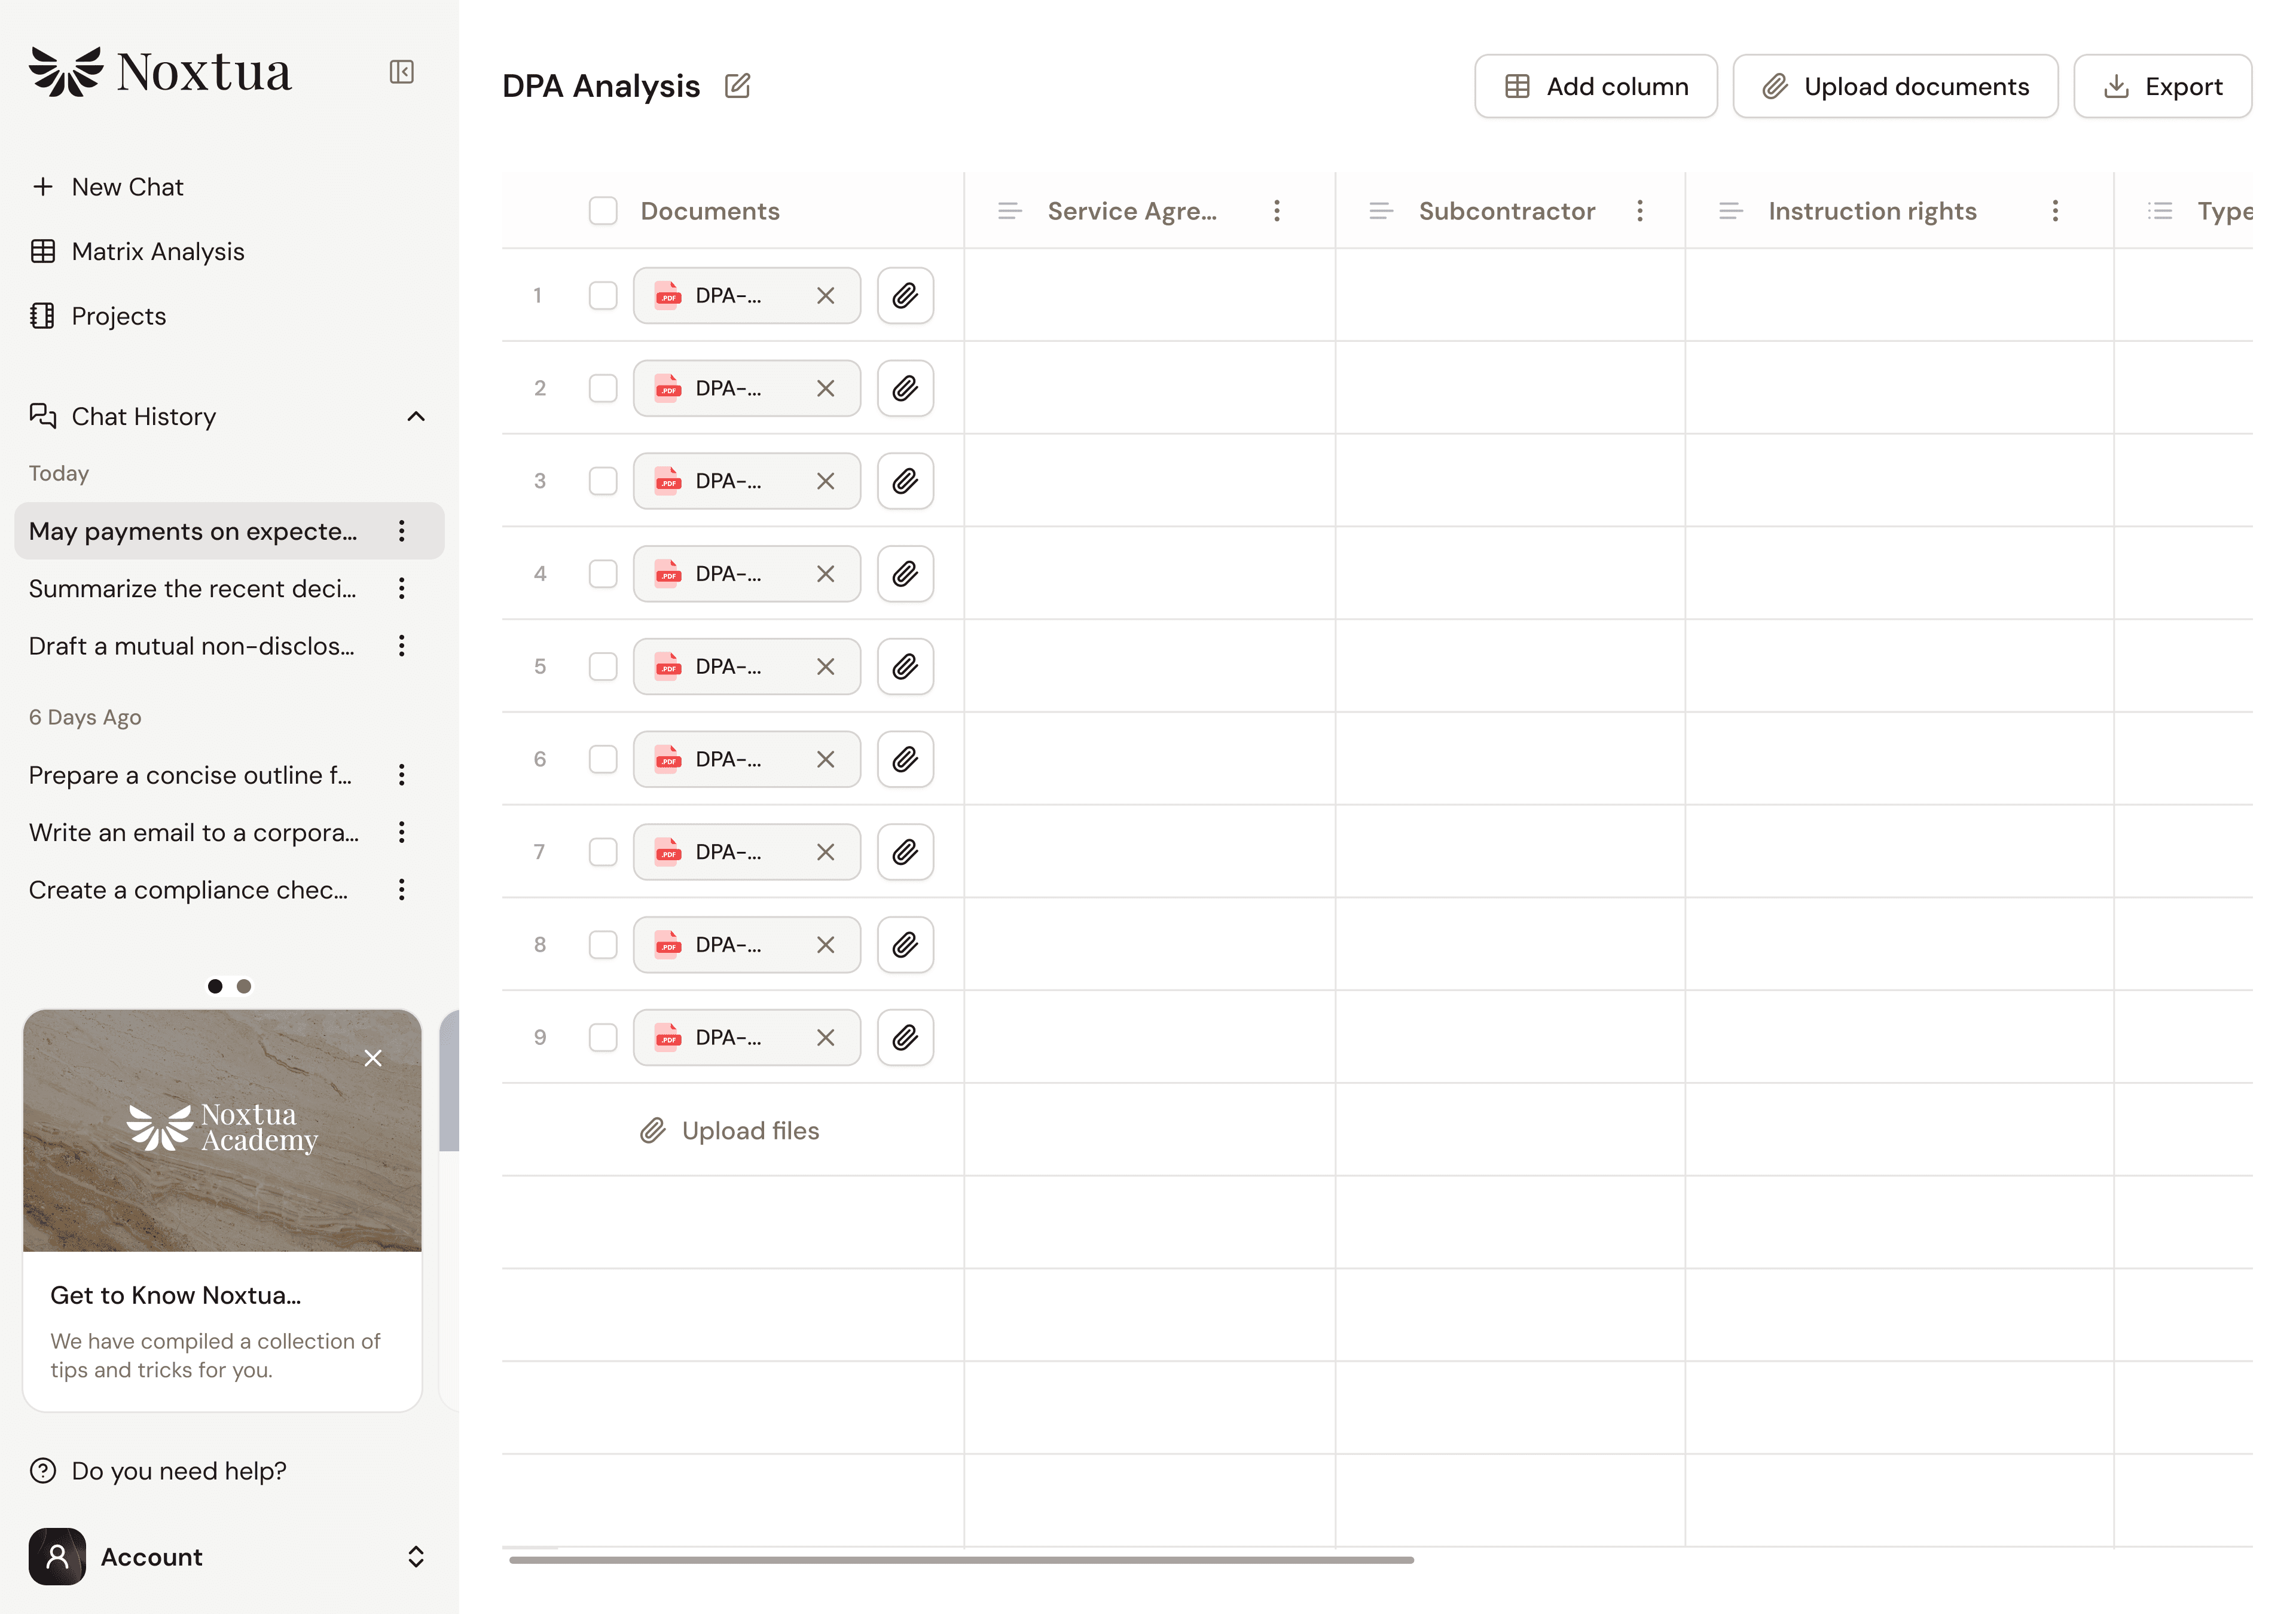
Step 3: Define the first column
Now comes the most important part: defining your evaluation criteria. Click "Add Column" to create your first criterion.
Start by choosing the suitable data format for your column. You can select from a variety of options:
"Text" is suitable for detailed answers or quotes from documents.
"Number" is used for measurable values like deadlines, amounts, or percentages.
"Yes/No" is ideal for simple evaluations such as "clause present" or "condition met."
"Categories" is useful for assessments like "low/medium/high" or "green/yellow/red."
"Date" is used when you want to extract specific time points.
"Bullet list" helps you create a structured overview of information.
For our example involving data processing agreements, we'll start with the processor. Select "Text" as the format and enter a descriptive column title.
Step 4: Formulate the appropriate prompt
Each column needs a prompt that tells the AI what information to extract from each document. Make this prompt as precise as possible.
For the processor data point, your prompt could be: "Who is the processor according to the contract? Extract only the party's name."
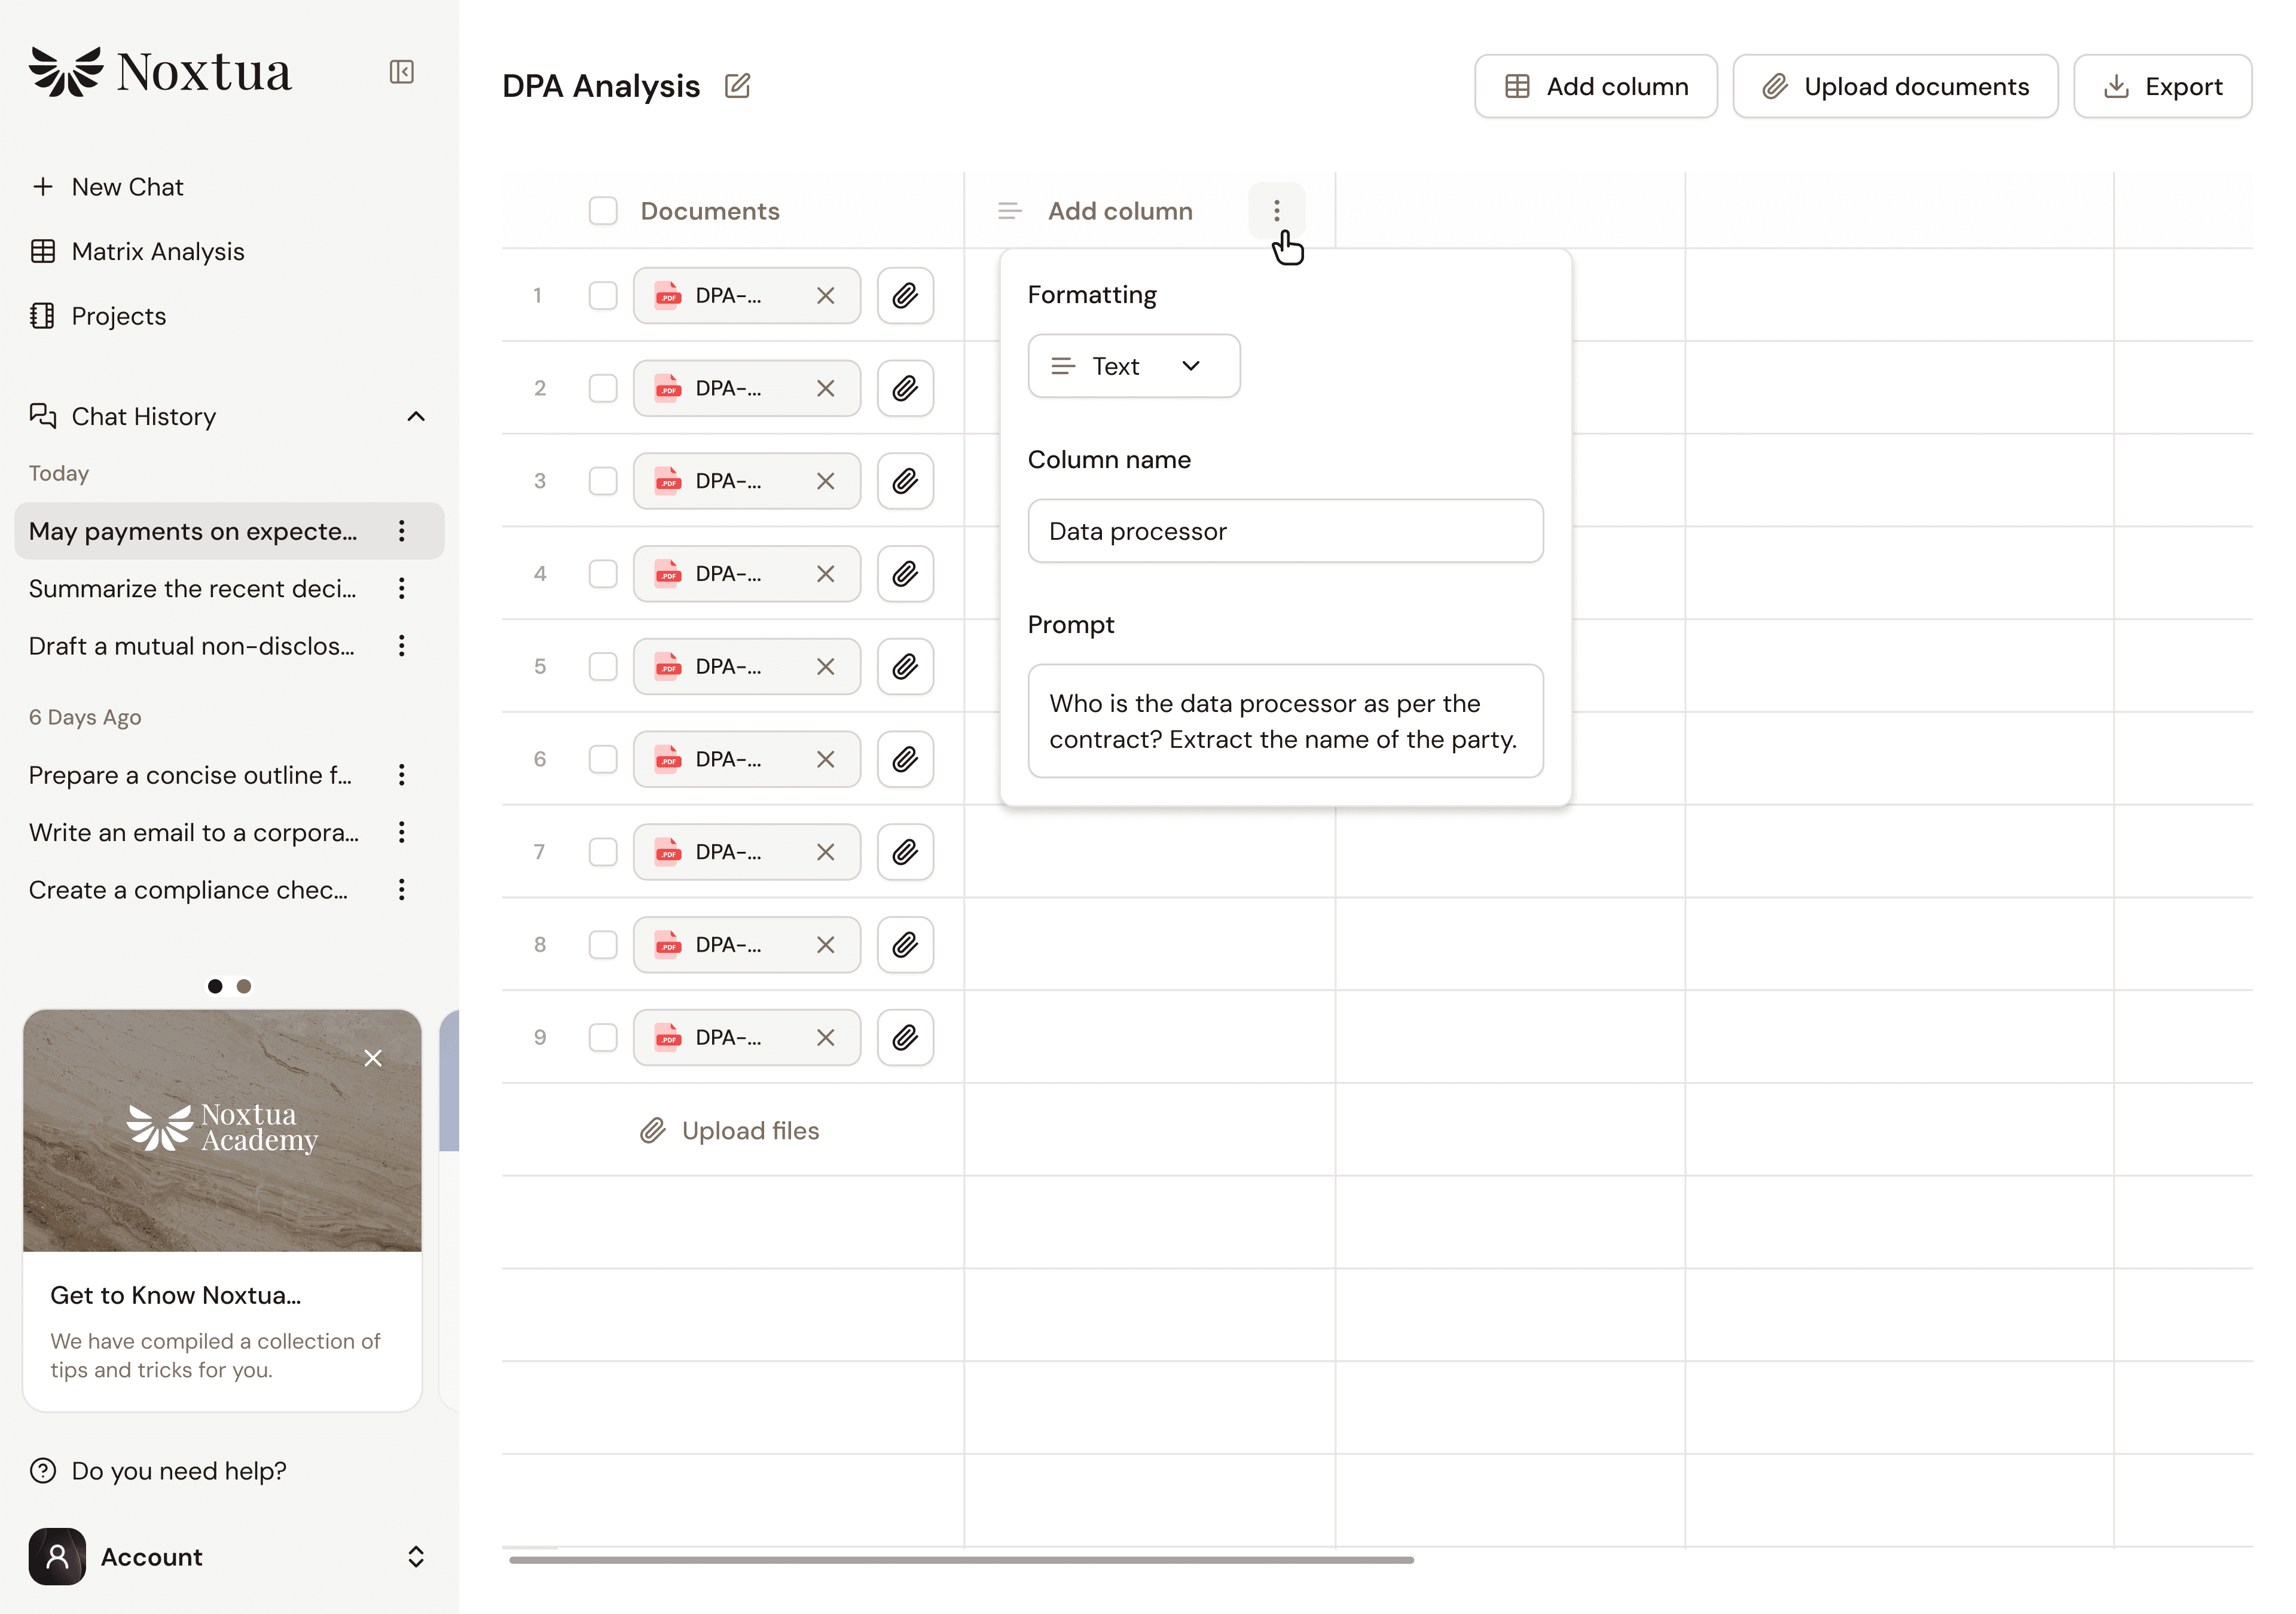
Once you've saved the prompt, Noxtua begins analyzing all uploaded documents. You'll see the results appear column by column.
Step 5: Add more columns
Now add more columns to capture all important aspects of your documents. For data processing agreements, another column could include a bullet list for the type of processing, with the prompt: "What is the subject of data processing according to the contract, meaning for what purpose and what data is processed?"
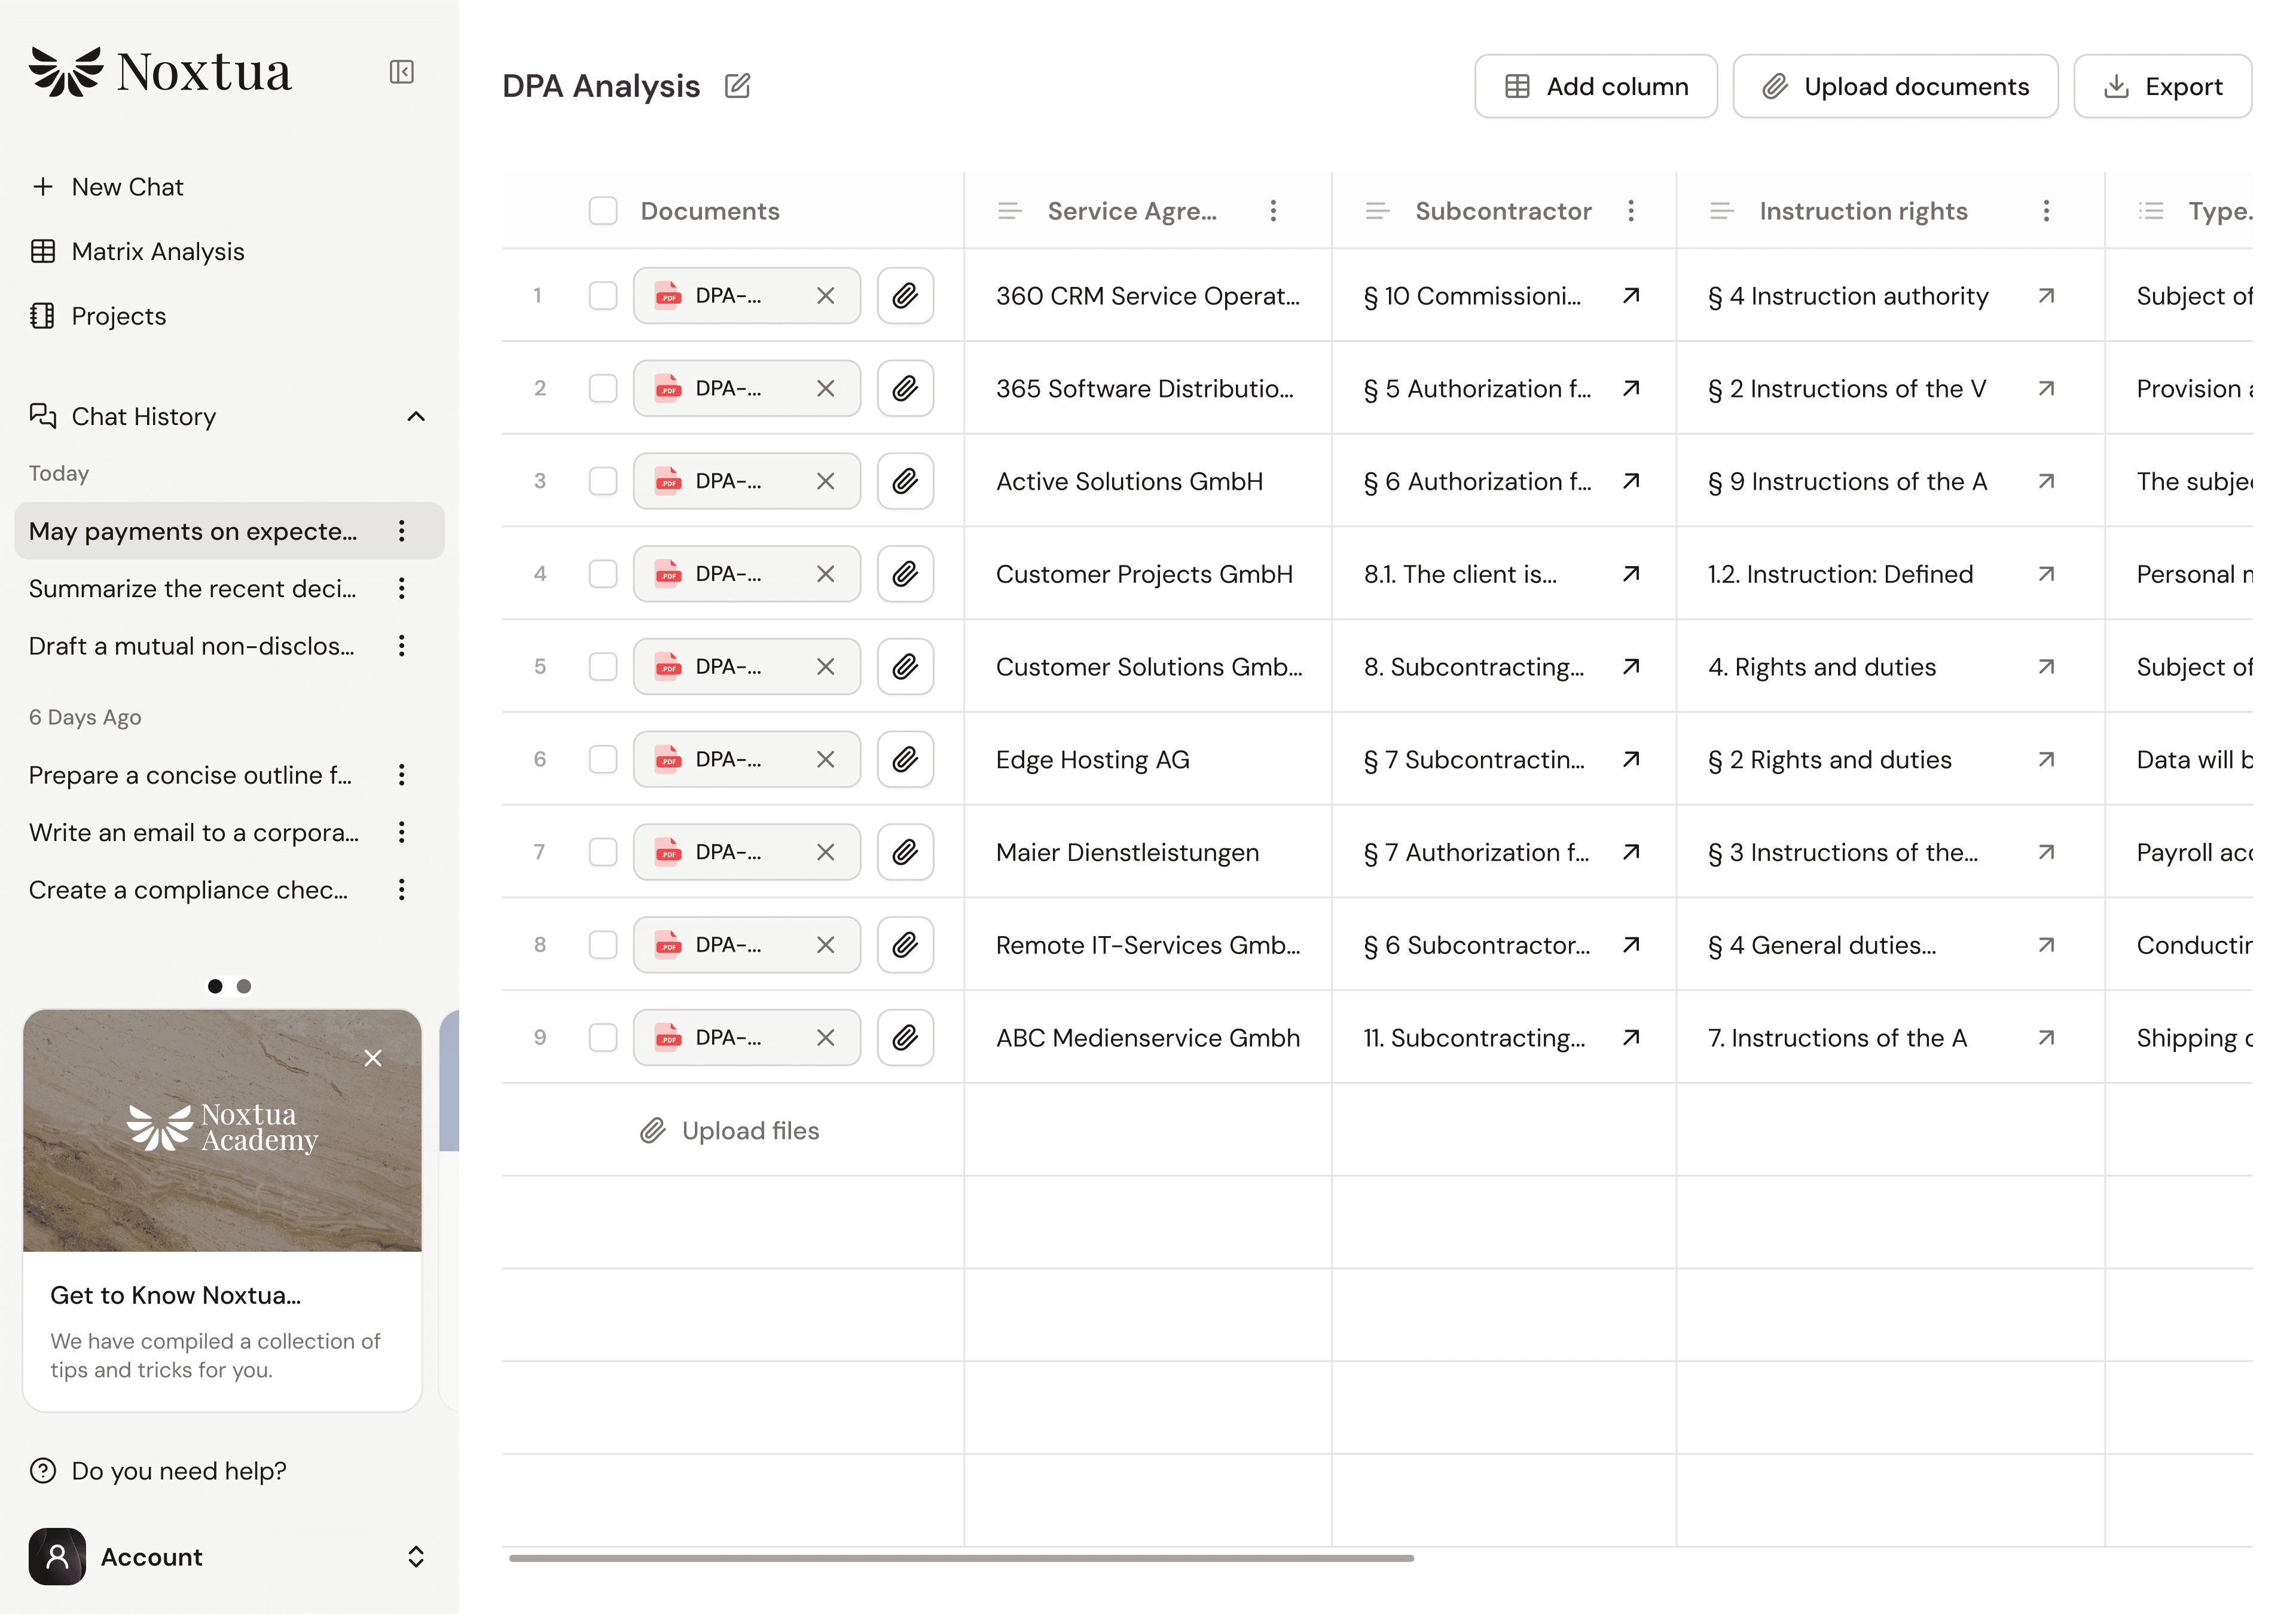
Step 6: Review and optimize results
While Noxtua fills your matrix, you should spot-check the results. Review individual entries and compare them with the original documents. If the results don't meet your expectations, you may need to adjust the prompts.
Click the edit icon next to the column title to refine your prompt. The matrix automatically updates with the new results.
Step 7: Export and share results
Your completed matrix now provides a structured overview of all important aspects of your documents. To use the results for further purposes, click "Export" to receive a file in .xlsx format.
Tips for successful matrix analyses
Tip 1: If you plan to analyze very large document volumes, test your prompts with a few documents first. This saves time and computing capacity. If the results are satisfactory, you can upload the remaining documents to expand the AI analysis.
Tip 2: Use the Categories format to create quick overviews. A traffic light system or risk categories not only make your matrix clearer but also help identify action items immediately.
Tip 3: For more complex analyses, you can combine multiple prompts in a single column or create references across columns. For example, if you want to create a risk assessment based on the results of several other columns, you can specify this in your prompt.

Dennis Engelhard